Tuesday, 15 December 2015

Full Project Self evaluation and reflection

This is my complete reflection for the whole project, i am going to reflect on all of the design processes that i went through during this term.

During this term i started with learning and trying out as well as learning simple designs on tinker CAD to learn the required skills. On my blogs that is one of my first posts after the basics of printing and 3D printing. After that we started to look at basic problems that negatively affects our working and personal lifestyle in some way, like that job takes too much time but it is necessary so we have to so it. I choose to do my project about a problem that my friends as well as people in my community face. then once i had a vivid image of what my product would look like i created my design specification. My specification consisted of what my  image will look like as well as the marketing side of it. we also thought about the advantages and disadvantages of using tinker CAD for my design. In this i considered the advantages as well as disadvantages of using tinker CAD. I thought that using a website that is as easy to operate and get through like tinker CAD  would mean that i could make what i want easily without any complicated errors. One of the disadvantages that i thought was that using tinker CAD would mean that it would not look realistic to go in a house, because of this my wanted aesthetics would not be fulfilled. if i had the choice to i would make the base of my product on tinker CAD and then i would copy it to another 3D printing website like sculptor to make this product more realistic looking.

Next we went onto criteria B, this mainly consisted of making 2 designs and reflecting on them. i made my designs so they both would do the same thing but had a few changes. as i was reflecting i realized how one would be much more convince than the other for the customer. during this i considered the ease of access as well as the design and if i would be well camouflaged within the surroundings of the house so the pets cant easily access it.

For criteria C i used tinker CAD to create my product, during this i faced a lot of difficulties and many of them were what i expected. i could not make the design look realistic and even though i was able to access it from all angles i was not sure of how it would look once it was created. i also was not able to make my deign open and close for the drawers which added to the problems. For next time when i am creating my design on paper i need to keep in mind that i will not be able to create the design on tinker cad the exact way i want it to look in real life.

Thursday, 10 December 2015

Criteria D

Peer Evaluation/ By Ashlesha:


I am happy with the reflection that my peer has giving me, and as she thinks that there are no improvements required i will make ones for my self, i think that my criteria B and C vary a lot so for next tie while making the drawings i need to keep in mind of what i am capable of doing on tinker CAD. i also think that my blog could be made more formal as this is a school and very important project.


During my self evaluation i need to keep in mind the aesthetics as previously mentioned so i can make what i want to make using what i have, but other than that i have met all the requirements in time and very similar to my criteria B design.

Tuesday, 8 December 2015

Criteria C - Creation


Reflection:

These are the parts of my final pet protected shoe rack, i have decided to create the first design that i drew as in mine and my peers’ opinion it is much more convenient as it takes minimal space. i have made a few differences to the project though, instead of making it in wood finish i have made it white but as mentioned in my design specification it will easily be modified and made in a way so it convenient to the consumer’s needs. everything that is behind the tiles is what will be in the wall as i made the built in version, in the design i was originally meant to make two storage sections but instead i made 1 which will be convenient as it will be more sturdy and less confusing to remember which shoes are in which rack. the fixing drawer in the main component and in it there is a shoe hole and four arms as it was originally meant to be. the front consist of buttons for the settings as it was also planned to be.

Wednesday, 18 November 2015

3D design and modeling- Criteria B


 Design specification


Design Ideas

Reflection:
in this design i have d=created a she rack that has 5 layers. the first layer is a closed one that is a biometric lock so that the pets cant take the shoes. under that there is the sock organizer  that is a drawer then under that is a pull our diagonal storage compartment with diagonal shelves that shoes can be easy to remove and put in. under that is the same shelves. After that comes the last layer whcich fixes all shoes as you can place ruined shoes in and change settings so they can adapt to the mending required. I made what I intended to in the design and to my surprise I had the tools required to make it on tinker cad and make it seem realistic.

 
Reflection:
I did not choose to do this design as I thought it would be comparatively inconvenient as it is big, and take a lot of space as well as that it would attract more attention of the pet as it much more clearer than the previous design. if I were to  make this design it would consist of the previous design without the wall and it would have two extra wardrobe style shelves but the rest of the stuff would be the same

Wednesday, 11 November 2015

Syringe using tinker CAD adapted for kids

Cardlle 


My target audience in this design is boys from the age of 4-9 because boys in that age prefer playing with cars. It is very useful as it is
not a still car but it can move on top of the syringe without causing any disturbance to the medical procedure. It will distract the children
for a long time, and so that it doesn’t seem fake it will be removable so the kids will have it the whole time that they are in the vaccination
room and will sit still if the numbing cream is applied. Another advantage of it being removable is that the nurse can take the syringe after
the vaccine is given. Also the car covers the part where the blood is taken so the kids won’t get scared after seeing how much blood is
take if there is any taken. To make this project I used a previous design that I had made and just modified it so it will fit and look good on
the syringe.
By Hiya Grover 8DD

Monday, 26 October 2015

Project- 3D Design and Modelining- Criteria A

Inquiry and Analyzing

Statement of Inquiry: Digital Design and Printing as a form of communication and output as evolved through time and space to influence the audience's perspective.

Introduction:

 I am a student of Digital Design and in year 8 as a digital design project we will be using a online software to create out own designs to help people resolve everyday issues in work that they do. The software that we are using is called Tinker CAD which creates very detailed designs for us to print using a 3D printer. As a part of our inquiry process and understanding about our statement of inquiry we looked at in which ways printing in general had evolved to history to reach the stage where we are able to perceptively design images online and make that into a real life sculpture that we can use everyday.

As a part of the MYP project i have decided to create a shoe rack that will only open with finger prints and that will have an automated cleaning machine to polish all types of shoes. It will also have the ability to fix any ruined shoes.

I have seen in my daily life that people in the community and my friends and family have some issues with their shoes and their pets. My friends also tell me stories about when their shoes have been seriously damaged because their pets have managed to get into the shoe rack and bitten off parts of shoes. another point is that when people come to school or go anywhere as a matter of fact their shoes are not up to a good standard. Teachers in school also get angry because shoes are not clean when they come into school. When adults go to important events, meeting and interviews then their and their companies standard are challenged because of the cleanliness of their shoes. the shoe cleaner will aslo polish any imperfections on the shoes that they may have, if any shoes are a ready damages in any ways then they will aslo be fixed in the mending compartments


 Primary Research:


Reflection:

I think that people that had problems with their pets taking their shoes understood and appreciated my idea, but people that didn't have a pet thought that it was not a major problem that is why they didn't think my idea was that good. After getting an explanation from me and a perspective from the people that have problems they agreed that this was a good idea. everyone rated this above a 5 which meant that the idea was good but no one gave a ten which means there could be improvements that could be made and one of them were if the machine could make the shoes as well so it would cost less money each time they had to get a new pair of shoes.


Secondary Research:

After doing my secondary research on the internet I have found that people have created a project that will protect shoes from dogs but the design is not full proof. The shoe racks that are available in shops and online now are ones that close inside themselves, this means when the whole thing is closed then the only thing that is visible is a flat surface. as I said before this is not full proof because the pets can reach up and click open the handle if it is within reach, in most cases it is. If this happens then  the shoes could be pulled out with not much effort  and be destroyed.
Where as in my design idea the shoes will not be able to be taken out because the doors will be locked by fingerprints and therefore even if the handle is within reach it will be of no use without the finger print. But this will not waste time as multiple fingerprints can be used to unlock once the setting is modified according to the costumers needs.so unlike the designs that available now my design would not let pets get into the shoe racks no matter how much they try.


Sunday, 25 October 2015

Tinker CAD Big Draw

Tinker CAD Big Draw Design

Task:

Make a Tinker CAD design for the big draw, make it creative and use all the skill you have learnt so far.

Steps For Penguin:

1) Put a sphere onto the grid
2) Stretch it into a oval
3) Make another smaller oval and place it inside the first oval
4) Add 2 small squished cylinders onto the face for the eyes
5)  Reshape a triangular pyramid and rotate and make it small to fit on the face as a beak
6) use a parabloid to make the arms
7) flatten it
8) Align it onto the body by rotating the grid
10) add 2 chicken feet at the bottom of the penguin
11) for the spatula use a flatten cube with holes and a thin cylinder
12) place it on the arm
13) group everything but remember to keep the multi colored function on
14) copy the penguin and make it smaller for the second penguin

Steps for the barbecue:

1) use 3 thin cylinders and a tube to make the stand
2) use 2 hemi-spheres for the top 
3) make a hole on the one on top
4) place thin sticks on the base one
5) make a small sphere and place it in between the sticks
6) make a few copies of that and place it between the sticks

Steps for the background and igloo:

1) flatten a cube and stretch it to make the ice
2) use a hemi-sphere to make the top of the igloo
3) use a cube to make the entrance


Reflection:

This was a very fun project it made me use  all of the skills that i learnt till date. i enjoyed making this a lot as i didn't have to follow instructions from another paper but i could think and experiment with whatever i wanted.
it was a simple design but it was not easy to make,  It was easy to make the background but it required a lot of effort to make the penguin. this was because it was hard to align everything . One of the hardest things to do was to make the arms fit in, because i only realized that i had to align the grid after doing all of the work. This design was not like the other designs as i could choose which parts i wanted to put in and what i didn't want to use. Over all this project was very enjoyable.

Monday, 19 October 2015

Tinker CAD Lesson 5

Lesson 5:


To make this crown I first had to bring a hemi-sphere onto the grid. Then I had to get one of the thin tubes and cut them in half by using a square and placing it half way through the tbe, then I hade the square a hole and grouped everything. When i had finished making the tube small enough I even placed it all aroung the hemi-sphere. After that I made the cylinder small and flattened it, after that I put it onto the hemi-sphere as well. For the round tube at the bottom I moved the thin tube onto the bttom of the Hemi-sphere. Finally I got a cone and placed it onto the top of the hemi-sphere. To add the finishing touches I coloured everything as shown in the picture and aliend anything that was remaining.

To me I found this very easy as I already knew hov to make all the pieces, the only thing that took me time was making everything well aligned. as in all of the other designs the shapes looked very well fitted from the front but when I rotated the gid to see how everything looked from the back it was a little disapoingting. But as I learnt how to fix that problem fast because of the practice on the other designs it became easier.

Saturday, 17 October 2015

Tinker CAD lesson 4

Lesson 4 (tinker cad)

Castle:


Making this castle was very challenging as it required all the skill that we had learnt so far and may more. One of the hardest parts were do get everything aligned properly, including the ridges. It was not very hard to do the ridges on the wall as I could just find and ideal size for the hole and duplicate the size and place them on the wall. It was also easy because all of the ridges were in one direction. But on the other had doing the ridges on the circle was very hard, this was because every time we had to put a square hole on the circle we would have to rotate the grid to make sure the hole is at a good angle and is facing the right way. When aligning the cylinders it was easy and all aligned form the front angle, but the moment we went up or changed the angle of the grid it would not be aligned. This is the reason I had to start again. Making this castle was also fun as it was nice to experiment with the shape and we could move around the shapes with no instructions stopping us. But if there were instructions it would have been much easier to make the caste the way it looked on the paper.
(Word Count: 233)
 
Car:


This car was also very hard to make but sine I had practice from making the caste without instructions it became much easier. This shape didn't require making any ridges or using too many hole so it was not as hard as the castle. In this I had to use different shapes than I had done in the previous one. it required me to make the base of the car using a parabloid and make it big enough to fit lights and wheels in it. the wheels' base was also make of the same shape and was given more detail with the tubes and a smaller parabloid. The middle was made out of a hemi-sphere and so was the front, just that in the front the shape was stretched out.
(Word Count: 130)

Smaller shapes:

All of the smaller shapes were very easy to make as I had make complex designs like the castle and car. Though this was easy it required me to use all of the skills that I had learnt in the basic lessons. It required me to move my shapes around, to make the shapes go above the grid, to make holes in the shapes and to size the shapes properly. For the smiley face it required me to flatten the cylinder and then make holes for the eyes and mouth, Then I made the speech bubble but flattening another cylinder and added text onto it. For the Snowman looking spheres I just had to shape the spheres by making one big, then medium and one small I moved them up and stacked them. Finally I aligned the spheres from all sides. The house was also easy to make as I just stacked shaped on top of each other not needing to make any holes. Making the wagon like thing was not as easy as I expected but it was not very hard either, I made the shape of the wheels and place a hexagon above then. to make the hole I created a bigger hexagon and placed it on top. After this I made the bigger hexagon into a hole and grouped everything.
(Word Count: 221)

Wednesday, 7 October 2015

tinkercad lesson 3

tinkercad lesson 3

lesson 6:
1)in this lesso i had to make a dice by ching the angle of the grid
2)i had to make a dice so the base of the shape was there but i had to move the grid to put the numbers
3) to do this i cliked the place that i wanted to move the numbers to after pressing W
4) i dragged the numbers on to the dice and scaled it so it is perfect


Reflection about all Lessons:

The lessons started very basic and kept getting harder and harder as i went through. I also l learnt many new skills every lesson. there are many tricks and shortcut on each lesson but it take a lot of time and effort to learn and properly use them. I was good at the first 4 lessons as I read the instructions and they were very basic and simple. then when the lessons started to get harder the instructions started to get longer and more complicated. in the end I learnt how to use all of the functions but I still need to polish using them.

Challenge: Make a Rocket-

This is the first rocket that I made using all of the skills that I learnt in the lessons. I used scaling, grouping, moving the grid around and changing the placement of the grid as well. I was hard as there were no instructions to help me but then when I got the hang of it, it became easier.


Monday, 5 October 2015

tinker cad Lesson 2

tinker cad lesson continued (5th Oct 2015)

I visited tinker cad and did lesson 1,2,3, 4 and 5

I went to lesson 1
1) we started simple
2) we just had to drag a shape from a grid to another place in the grid


I went to lesson 2
1) in lesson 2 I learnt to use the arrow keys
2) I learnt to move the grid around
3) and I also learnt how to see what is on the other side of the curtain


I went to lesson 3
1) for this one there was a shape of a spanner on the grid
2) then I dragged a hexagonal prism on to the shape
3) then I clicked the group button
4) my shape was done and I made a spanner that had a hole


i went onto lesson 4 and followed the steps
1) drag and drop a cylinder onto the grid
2) drop another cylinder next to it
3) the scale the second cylinder to 15mm
4) next to the 1st cylinder i copied and pasted another one and scaled it to 10mm


next I went to lesson 5
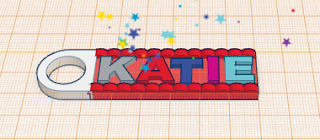
1)for this one we made a key ring
2) I dragged and dropped the alphabets onto the red base
3)I used my arrow keys to make it more precise
4) I altered the shape of the red base to make it the size of the name
5) I deleted the extra letters on the page and it was done


Wednesday, 30 September 2015

3D Design and Modeling

Tinker Cad Reflection


Today in Digital Design we learnt how to make 3D Models that we are going to use to print with our 3D Printers. To do this we first created a tinker cad account using our Gmail accounts. Then we saw a tutorial about how to make a boat on tinker cad. Then we tried to do it on tinker cad, but before that we used the lesson on the application to practice. I did 2 lessons and then went on to making the boat that we saw in the tutorial.
When using tinker cad I saw how fun it was and there were loads of options to make the structure. But when using it I also saw how it was very hard to make things properly. I think what was bad was the tutorial showed us options that we had to click but when we attempted to use them on the real app they were not there. It would be much better if we used a tutorial that was updated and the same as our accounts.
After doing all the research I thought that the modeling would be easy but it is very hard to make it to be as a good project when it is printed. I am very excited to do our assessment as it will be using the same website to do it.


Tuesday, 29 September 2015

3D Printing


3D Printing

1.     What is 3D printing?

It takes a digital file (Like a picture) and on the print command it prints the file in 3D. It is very helpful for artists and designers and its use is increasing rapidly.

2.    How does 3d printing work?

First you have to create a 3d image in the computer using any type of software (e.g. CAD- Computer Aided Design). Then connect the computer to a 3d printer and press print. When you press print the printer takes your image and slices it up into tiny pieces then starts to join it up again from bottom to top. This sculpts the picture into a 3d model.


3. What is the technology behind 3d printing?

There is hot plastic strands inside the printer and when the common is given it squirts out hot plastic in the shape if the object by moving the nozzle around a piece of glass.


 4. Where would you find 3d printing?

One of the most important uses of 3d printing is in the medical field because surgeons can make models of their patient’s bodies so they can practice on them. They and also be used in medical colleges in the same way. Other than this they can be used in art, architecture, jewelry, fashion and interior design.


6.    Who would use 3d printing?

Surgeons, artists, architects, interior designers, etc..


References:

1.      No Author. (2015). 3D Printing Processes: The Free Beginners Guide.


 Last accessed 29/9/2015


2.      Brewster, S. (2013). How does a 3D printer work? The science and engineering behind this emerging technology .


Last accessed 29/9/2015.


3.      N/A. (2015). What is 3D printing?.


 Last accessed 29 September 2015.


4.      None. (2011). 3D Printing Basics.


Last accessed 29/9/2015.


5.      Walker, A. (2013). 3D printing for dummies: How do 3D printers work?


 Last accessed 29/9/2015.


6.      No Author. (2015). What is 3D printing?.


 Last accessed 29/9/2015.


Monday, 21 September 2015

Reaserch on difference types of printers

3D Desigm and Modeling- Inquiry and Analyzing

 
Johann Gutenberg invented the printing press in the 1450. The first book that was printed was in Mainz, Germany and it was a bible in Latin that was very beautiful as it had later been mimicked by other people by hand. Though he had made one of the best inventions till day he had a few unwanted business partners that captured over all of his work and left him in a very poor state. Even after all of these incidents we were still able to make replicas and modified versions of the printer and because of Johann we are able to successfully print all types of books and documents. Because of this invention we are able to develop his ideas and make all sorts of new computers.

Printers are separated into two groups; impact and non impact. impact printers make comtact with the paper while printing, they use hammers or pins to print the image. On the other hand non impact printers don't use any pins or hammers and that is why they are very quiet.


 References